
Ring a menu is perfect for businesses that want to project themselves as a larger organization. You can use either My.Phonoe.com or the Control Panel depending on you you administer your account.
Set up a menu in Control.Phone.com
Set up a menu in My.Phone.com
Login to My.Phone.com with administrator credentials. Then select Numbers from the Administration dropdown and click the pencil icon next to the phone number you want to configure.

Select Use a Menu from the call handling options.

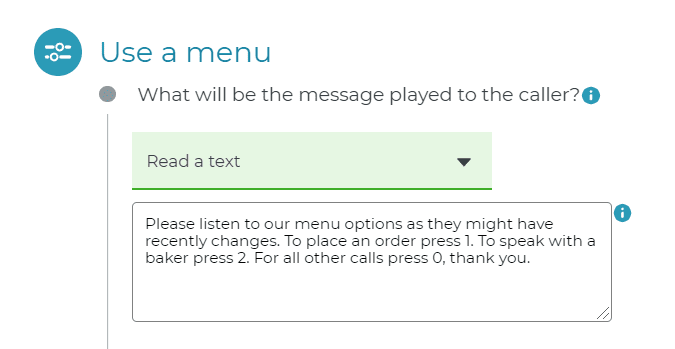
After selecting the ‘Use a menu’ option, you will be asked to select one of three ways to assign a greeting. You can select the ‘Read a text’ option to type in your greeting; just make sure to use proper punctuation as it is sensitive to these rules.
You can also use your machine’s microphone to record the greeting with your own voice or the voice of a colleague by selecting the ‘Record a message’ option.
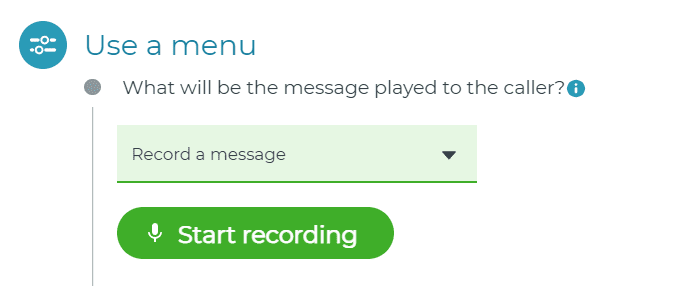
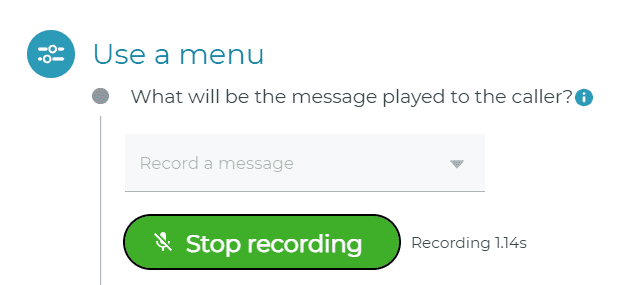
Once selected, press the Start recording button and begin recording your greeting; once you’re done recording, simply select the Stop recording button.
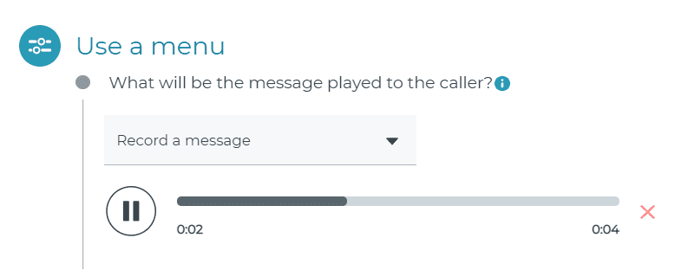
You can preview the recording by selecting the Play/Pause button or re-record the greeting by selecting the red X located to the right of it.
We also provide a way to upload your own audio file in case you have it. Simply select the Upload audio file option and select the Upload a file button.
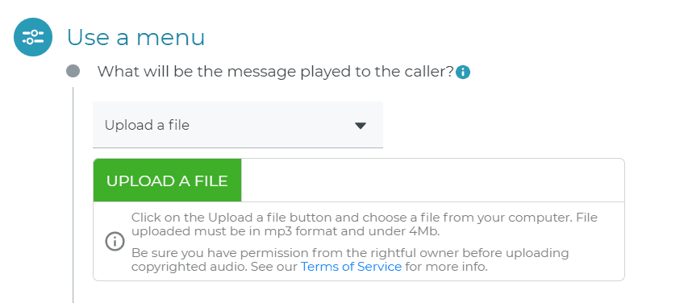
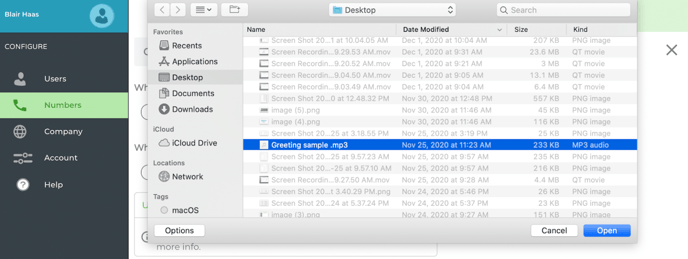
Search for the file and select it so it can be uploaded. Make sure the file type and size is within the limits.
Menu options
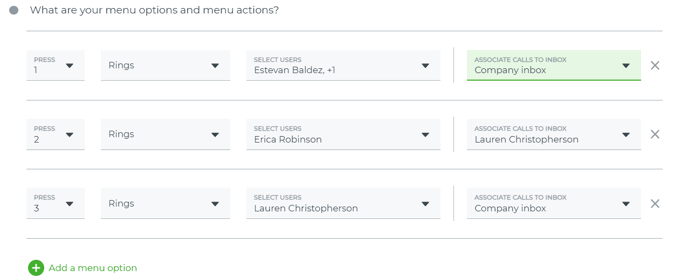
Once the greeting type is selected you will be asked to set up your menu options and actions. Simply think of how many options you want to offer to your callers and add them by selecting the Add menu options then, assign the user or users to ring and where to send the voice message in case they miss the call and repeat for all remaining menu options.
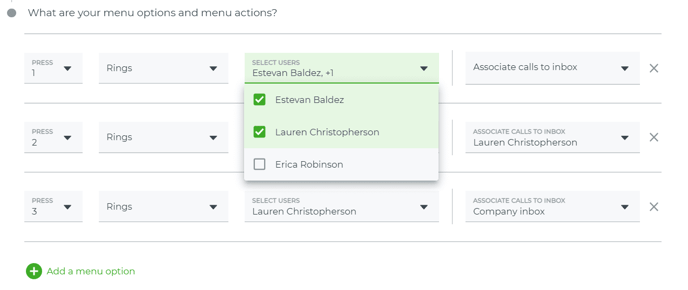
You can always remove any unwanted menu options by selecting the red ‘X’ to the right.
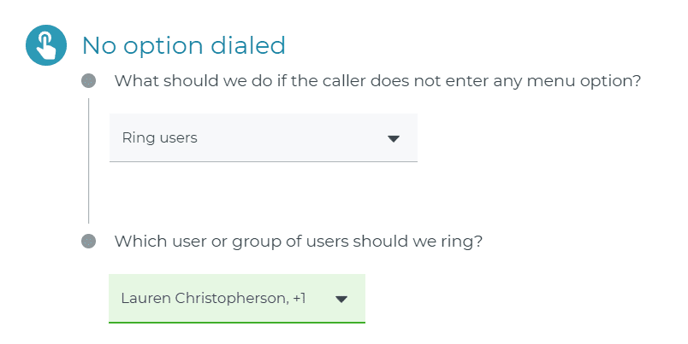
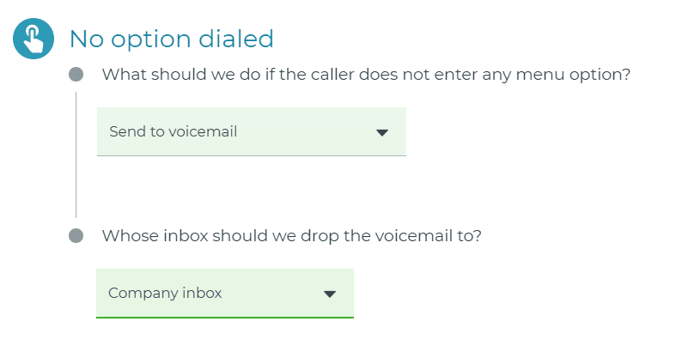
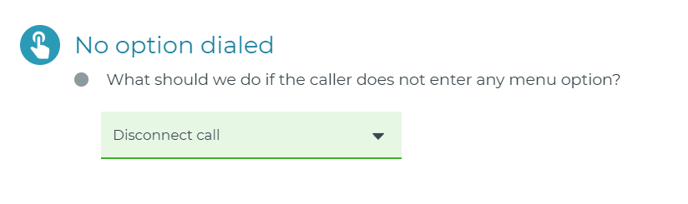
No option dialed
After the menu options and actions are set you have to decide on one of three options in case the caller does not make a selection after your greeting is played. You can ring a user or group of users by selecting the user drop-down list and selecting who to ring.
You can also send the call to a user’s voicemailbox, the company mailbox, or your own.
Or you can simply disconnect the call entirely.
You should see a confirmation on the bottom of the page that says the configuration was saved successfully.

You can always check the number under the My Numbers tab to make sure it was saved correctly.

Set up a menu in Control.Phone.com
Administrators of Phone.com control.phone.com accounts can log into the Control Panel and follow these instructions.
Adding and activating a menu includes the following three steps:
- Adding a greeting for your menu that describes the different number selections a caller can make.
- Adding a menu to your account, and setting up forwarding options for each of the number prompts in your menu.
- Activating the menu, so that calls are automatically routed to it and your greeting plays.
WEBINAR:
While this article discusses how to add a menu greeting. You can also learn how to do so via our instructional webinar below.
Adding a Menu Greeting
- Mouse over Configure and click Add a Greeting.
- In the Nickname field, enter a nickname for your greeting, so that you can easily identify it later.
- Record your greeting using either Text To Greeting, Record From Phone or Upload New File.
- Select Save Greeting.
Adding a Menu
Now that you’ve added a menu greeting, you can add the actual menu to your account and identify the greeting as the message you want callers to hear.
- Mouse over Configure and click Add a Menu.
- In the Name field, enter a name for your menu.
- Select the greeting you added as the outgoing message from the drop-down menu. You can also add a second invalid-entry greeting that callers would hear if they press an invalid key.
- For Allow extension dial, select Yes to allow callers to enter an extension number at anytime to bypass the menu and dial that extension.
Click Continue.
The menu is created and call handling (forwarding) settings are displayed for each number selection.
Setting Forwarding Options for Your Menu
The process of setting options for each number selection will vary depending on how you want calls to be routed. In the steps below, we will simply forward calls to Sales for [1] and send calls to voicemail for [2].
There are many other actions available. They include playing another greeting or hold music, forwarding the call to a queue, connecting to receive a fax, and others.
You can also add a sequence of actions for each number selections. For example, when a caller presses [1], you could route them to your Sales agent’s extension, allowing the phone to ring for 20 seconds, and then go to the voicemail Inbox for that extension. Number selection [2] might be to go directly to your company’s main voicemail Inbox immediately.
- For number selection [1], click Edit.
- On the Call Handling Rules page, change Select Operation to Forward Call.
- Enter an extension number in the text field, select the number of seconds that you want the line to ring, and select whether or not you want to play hold music.
- Click Add Next Action.
- Change Select Operation to Leave Voicemail.
- Enter the voicemail extension number in the text field.
- Click Save Rule Settings.
Once you have added forwarding options for all of the number selections you want to define, click Save Changes to save the menu.
These steps show you how you can build a series of actions for each number selection to manage calls.
Activating Your Menu
Note: Before you can activate your menu, you must add a menu greeting and add the menu itself, setting up call forwarding options for each number selection.
- Mouse over Configure and click Manage Numbers.
- Select Edit for the phone number that you want to forward to your menu.
- For Number Action, click Edit.
- On the Call Handling Rules page, change Select Operation to Go to Menu, then select the menu you just created from the drop-down menu.
- Click Save Rule Settings.
Your menu setup is now complete! When callers reach your Phone.com number, they will hear your menu greeting and can choose the routing options that you added to your settings.